need more info? call 844.899.6462

Microblading 101 – Everything You Should Know

The world is once again embracing full eyebrows. However, while this may be great news for those with naturally thick eyebrows, achieving the full eyebrow look can be difficult for those with thin, sparse, or lightly colored natural eyebrows. Microblading is a great option for individuals who don’t want to use makeup every morning or prefer a more natural look. If you choose not to apply liquid foundation, pencils or powder may be used to fill them in; however, if you don’t want to go through the trouble of applying makeup every morning, NIMA’s microblading may be worth considering.

Thinking about getting microblading done? Here’s everything you need to know about the procedure, from what it is to the pros and cons.

What is microblading?

Microblading is a relatively new and increasingly popular way to add natural-looking fullness to your brows. Microblading is a semi-permanent makeup treatment where special pigments are placed under the top layer of your skin in hair-like strokes, similar to a tattoo but not as deep.

To obtain the desired effect, a pen-like instrument with seven or more micro-needles in various arrangements is used to produce the required effect. The brow artist may also pluck the skin and deposit the ink manually using a shading technique.

How long does microblading last?

The microblading procedure is designed to not last forever, but how long it lasts does depend on each individual’s skin type.

It is predicted to last for up to two years, with touch-ups recommended on average every six months, but some clients may require touch-ups more or less frequently. Different people react differently to the microblading technique, so your artist will first use the first session to observe how your skin and brows respond, then help you create a touch-up regimen as needed.

Does microblading work for anyone?

Microblading isn’t appropriate for everyone. Those who have specific health or skin issues, or who have recently had certain treatments, may not be suitable candidates for microblading.

Your brow artist may not recommend microblading if you have any of the following:

  • Eczema
  • Shingles
  • Ink allergies
  • A prescription to an acne medication such as Accutane
  • A prescription for blood thinners
  • Diabetes
  • Recent chemical peels or waxing

Microblading is best suited for individuals who have healthy skin. If you’re not sure, book an appointment with us and we’ll help you determine if microblading is appropriate for you.

Does it hurt?

The skill and training of your brow artist is important to ensure a painless procedure. At NIMA, our artists are highly skilled and trained to provide you with the best possible experience.

At NIMA, we make every effort to make the procedure as pleasant and painless as possible. We’ll apply a numbing agent on the brow region before your microblading. You may feel some soreness following the treatment, which can be alleviated with an over-the-counter painkiller.

Is it safe?

Because microblading procedures and inks are not regulated, it is vital to only go to credible and experienced brow artists like NIMA. Microblading complications include anything from minor problems, such as misaligned brows, to severe ailments, such as infection. The likelihood of any problems happening post-procedure is reduced by going to an experienced artist.

Once the procedure is finished, it’s normal to experience redness and itchiness. However, you should speak with your doctor urgently if you have severe pain, swelling, or oozing.

How long until it’s healed?

The healing process varies from person to person, but it usually lasts around two weeks and takes a month to complete. After the brow appointment, darkening of the area is normal and it will soften and peel in a few days. The true color and tone of your newly microbladed eyebrows will show after around one month. Depending on your skin type, your brow artist will recommend the best skincare routine for you. People with oilier skin need to ensure there is no oil buildup, and those with drier skin must keep their area hydrated.

What if I want to learn how to do microblading in SLC?

NIMA is pleased to announce our partnership with Couture Brows. Couture Brows is a group of highly respected and experienced microblading specialists who will provide an excellent learning experience in our classes. You will have the opportunity to study cutting-edge methods with some of the best microblading instructors from around the world. You’ll learn how to make delicate, feathery, and realistic hair strokes that resemble real brows. You’ll also learn how to design the ideal brow shape for each face type and eye size in the handbook.

Microblading is a relatively new cosmetic art that has generated a lot of money for creative professionals. This course is designed for individuals with the proper licenses in their state to offer these services. Non-licensed individuals, ME, RN, PA, APRN, MD, and DO are all examples of licensed non-medical personnel. According to NIMA, you should check with your state to see if any licenses are required in your area of expertise. This program has been evaluated and found to satisfy all NV’s “Body Art Card” criteria.

If you’d like to learn more about esthetics classes, check out How To Find Esthetician Schools Near Me, to get all of the details.

What you will learn at NIMA’s courses on micrroblading in SLC

  • Workspace preparation
  • Client preparation
  • Drawing the brow
  • Applying pigment
  • Airbrush blending, stroke, shading, & ombré techniques
  • Students perform 3 model applications
  • Microblading & Soft Tap methods
  • Combo procedures

For more information about NIMA’s microblading training, click here to learn how you may enhance your career.

The Biggest Fall Skincare Trend: Chemical Peels

Wanting to look your best this fall season? You’re not alone. Chemical peels are all that anyone and everyone is talking about. Chemical peels are a type of cosmetic surgery that use chemicals to remove layers of skin and reveal the healthier skin beneath. Chemical peels are used to treat a range of skin problems, such as fine lines and wrinkles, acne, scars, uneven skin tone, and other blemishes. The depth of your peel and the kind of skin problem treated are determined by different chemicals.

What are chemical peels?

A chemical peel is a derma resurfacing procedure that uses chemicals to peel away the dead and damaged skin cells on the surface of your skin. This process causes cell turnover, which results in refreshed, new looking skin. With time, the old layers of skin will shed to reveal youthful and glowing skin below. The new skin is often smoother, with less wrinkles and fine lines. It also has an even complexion in terms of color and brightness and can remove or reduce acne scars, sun spots, and discoloration.

What medical problems and other conditions does a chemical peel help to treat?

Chemical peels can make your skin look better by evening out the tone and improving the texture. They are also used to treat certain skin conditions. The majority of chemical peels are done on your face, neck, or hands.

They may aid in the reduction or improvement of the following skin conditions:

  • Lines under your eyes or around your mouth resulting from sun damage, age, and genetic factors. 
  • Some types of acne.
  • Scars that are visible but not severe.
  • Darker melanin spots, responsible for producing these pigmentation disorders: sun spots, age spots, liver spots, freckles, and uneven skin color.
  • Actinic keratosis can be treated by removing the buildup of skin cells and reducing inflammation.
  • Can help improve your complexion: roughness, dryness, or flakiness.
  • Melasma is a type of permanent hyperpigmentation that occurs when the sun’s UV radiation damages your skin. It can also be caused by pregnancy, as well as using birth control pills.

Together, you and your dermatologist will decide how deep your peel should be. This decision can change depending on the state of your skin and what treatment goals have been set. If you have sagging skin, bulges, deep scars, or severe wrinkles, chemical peels will not give you the desired results. If these are your concerns, other cosmetic surgical treatments such as carbon dioxide laser resurfacing, a face lift, brow lift, eye lift, or soft tissue filler will be better alternatives. A dermatologist can help you choose the best treatment for your issues.

Does every skin type benefit from it?

Superficial peels are good for all skin types usually, but if you have darker skin, there is a bigger chance that your skin will darken after the treatment. Post-inflammatory hyperpigmentation is a skin condition that develops when inflammation, such as sunburn or acne, persists after the injury has healed. If you have a naturally darker complexion, talk to your dermatologist about other less severe therapies to minimize the chance of hyperpigmentation.

Chemical peeling is usually not recommended if you:

  • Have a history of skin scarring that is abnormal
  • Have extra coloring in your scars
  • If you have any skin problems or use medications that make your skin more sensitive
  • You need to be in the sun consistently after the procedure

What happens during a chemical peel treatment?

Chemical peels may be done in a doctor’s office or a surgery center as an outpatient treatment. Your skin will be cleansed with a solution that removes excessive oils, while your eyes and hair are protected. A chemical solution is then applied to your skin. Chemical solutions used in this process include glycolic acid, trichloroacetic acid, salicylic acid, lactic acid or carbolic acid (phenol). The various types of chemicals induce a controlled injury, with each one entering through a different skin depth and subsequently peeling away to expose a new layer of skin.

Types of chemical peels

The peel’s depth relies on the strength of the chemicals used, which your dermatologist will help you choose.

  • A light (“lunchtime”) chemical peel, which provides a little improvement over time and is frequently done in a series, targets the outermost layer of skin. The epidermis is removed from the surface. This option may be ideal for enhancing a healthy glow if you have fine wrinkle lines, acne scars, uneven skin coloration or dry sun-damaged skin. It might take hours to days for this type of peel to heal; however there will be little to no downtime.
  • A medium chemical peel will transform your skin into looking smooth and fresh. The top layers of dead skin are removed, as well as the upper part of the middle layer. If you have moderate wrinkles, age spots, acne scars or uneven skin discoloration, this is probably the best option for you. However,… be aware that it usually takes a week or more to recover from this type of procedure – meaning minimal activity levels during that time period.
  • A deep chemical peel is the most effective way to achieve dramatic results. This chemical penetrates down to your skin’s lower middle layer. Recovery time is longer with a deep peel, but it may be the best option if you have moderate lines and wrinkles, extensive sun damage, deep acne scars, blotchy skin, or precancerous growths called actinic keratosis. If you receive a deep chemical peel, expect to take it easy for about eight weeks. Once applied to your face, this will be a one-time only treatment with some significant recovery time. Be sure to follow any specific instructions from the experts.

How to prepare

  • Try to steer clear of tanning and being in direct sunlight for two weeks leading up to each treatment
  • To prepare your skin, apply topical medications (such as hydroquinone) as directed before treatment
  • Do not use retinoid products, like tretinoin, one to two weeks before treatment unless your physician advises you otherwise
  • If you’ve been given oral antibiotics or an antiviral pill to treat cold sores, stop taking it at least 24 hours before your chemical peel
  • Any areas to be peeled must have healed completely, with no open sores or skin infections
  • Depending on the type of peel and your skin condition, your doctor will give you specific instructions

Day of peel: You will be completely cleansed. If you have a deep chemical peel, you may or may not receive general anesthesia (you will be asleep).

The procedure: A chemical peel is a process in which a solution is applied to your skin. You may experience a warm or hot sensation for a few minutes, followed by an itchy feeling. To reduce the discomfort, we’ll apply a chilly compress to your skin. The chemical is afterwards washed away or neutralized.

What are the risks?

If you have a certain skin type, there is a chance that the color of your skin may change temporarily or permanently. If you take birth control pills, are pregnant, or have a family history of brown discoloration on your face, your risk for developing abnormal pigmentation increases.

You’re also less likely to experience scarring in some areas of your face, though some people are more prone to it. If scarring does happen, know that there’s usually a successful treatment for it. if you have had herpes outbreaks before, there is low risk of reactivating the cold sore sea creature friend again. Your dermatologist can prescribe medicine which will lower the chance Beforehand; all you need to do is follow their directions!

Tell your dermatologist if you have a history of keloids (scar tissue overgrowth caused by an injury to the skin), any unusual scarring tendencies, or X-rays of your face or prior experience with cold sores before having chemical peels. Infections are uncommon but still possible.

After the procedure, what can I expect?

Depending on the depth of your chemical peel, you may or may not notice any changes after treatment.

If you’ve had a light chemical peel

  • Expect a sunburn-like sensation to follow your peel, with redness and scaling that persists for three to seven days.
  • Use lotion or cream as often as directed until your skin feels better. Once it does, apply sunscreen every day.
  • You may apply makeup immediately following your treatment, or the subsequent day.
  • Peels may be repeated every two to five weeks until you achieve your desired results. Three to five peels are usually needed to reach your goal.

If you’ve had a medium chemical peel

  • The side effects of this treatment may include temporary redness, swelling, stinging and flaking of your skin. Swelling could last and/or worsen for 48 hours. Blisters might develop and eventually break open. The treated area will crust over and peel off within seven to 14 days.
  • As directed by your doctor, perform daily washes. After each soak, apply ointment. Apply lotion or cream on a regular basis. Don’t expose your skin to direct sunlight until it has completely healed.
  • The duration for which one must take antiviral medication is 10 to 14 days.
  • Makeup can be applied approximately five to seven days post-treatment.
  • Depending on the results you want to maintain, additional peels may need to be done every six months to a year.

If you’ve had a deep chemical peel

  • Once the treatment area is bandaged, we’ll remove the bandages in a few days. The healing process should be completed within 14 to 21 days.
  • Perform daily soaks as directed by your doctor and apply ointment after each soak. After 14 days, you can begin to moisturize your skin as directed. However, it is important that you avoid exposure to sunlight for three to six months following treatment.
  • Anti-viral medicine will need to be taken for 10 to 14 days.
  • Wait at least 14 days before applying cosmetics.
  • You can only have one deep peel procedure performed on your face at a time.

How to get the best results

Your skin is especially delicate after your chemical peel and more vulnerable to problems. To decrease the likelihood of complications, like blotchy pigmentation, follow your doctor’s post-treatment guidelines carefully. Call your doctor if you have any of these symptoms: Itching, swelling, or burning. Scratching your skin might cause an infection. 

Here are some of the top things you should do for the best result:

  • When your skin is healing, don’t use a tanning bed or any other sort of indoor or outdoor tanning.
  • Once your skin has healed, be sure to apply sunscreen every day.
  • Apply a moisturizer every day, as directed, to keep your skin hydrated and avoid scarring.

Best place to get chemical peels in Utah

NIMA is the leading school of aesthetics in the state of Utah and offers incredible services at discounted prices. We offer discounted prices so our students can help with their training. No need to worry, you will always have a professional in the room with you!

If you’re interested in booking an appointment with us, click here to request a consult.

If you’d like to learn more about esthetics classes, check out How To Find Esthetician Schools Near Me, to get all of the details.

What Is A Lash Lift? Everything You Need To Know About Them

Have you ever fantasized about having luscious, fluttery eyelashes without having to apply mascara? If so, you aren’t the only one. Lash lifts have surpassed mascara in popularity, according to a 2018 article in Business of Fashion. But what is a lash lift? What can you expect from a treatment like this?

In this blog, we will go over all things concerning the treatment after and the procedure.

What is a lash lift?

A lash lift is a natural, semi-permanent procedure that creates the appearance of fuller, thicker eyelashes without the use of any leave-on chemicals or additions. The natural lashes are enhanced from the root, giving them a lifted, extended look.

You won’t have to worry about clumpy mascara or irritating falsies with a lash lift. You’ll also wake up every morning with naturally long, thick lashes. Many people tint their own lashes a darker color to enhance the look. Consider it a perm for your eyelashes.

Ideally, the process should be quick and painless, allowing you to soon enjoy your lashes to your heart’s content.

“It will be just like you’ve woken up with your favorite mascara already on,” claims Lucy Roberts, aesthetician at False Eyelashes. 

How long does a lash lift last?

A lash lift isn’t permanent. After a few weeks, the results may be gone, and you may once again reach for the mascara. In general, this lasts around 4 to 6 weeks, although this can differ based on your lashes and the type of lash lift you choose. You might be able to extend the life of your lash lift by taking good care of them.

However, not all treatments are the same.

“How long your lash lift lasts is entirely dependent on how well you prepare and follow aftercare, as well as your natural lash growth cycle,” adds Roberts.

Do you want to know how long your lash lift will last? There are a few factors that influence the length of time your newly lifted lashes survive.

  • immediate aftercare
  • long-term lash care
  • how fast your lashes grow naturally
  • the type of treatment you get

Even though you take excellent care of your lashes, you may discover that your lash lift does not last as long as those who have had the same treatment. This might be because of how fast your natural lashes grow.

Immediate aftercare

Following a lash lift, what you do right away may have a significant impact on how long the treatment lasts. The treatment takes up to 48 hours to set, so keep the aesthetician’s instructions in mind.

“It’s critical to wait 48 hours after applying the lift before cleansing your eyes or putting on makeup,” says Alexis Parcells, a plastic surgeon and founder of SUNNIE. “Additionally, ask for a cleansing brush to keep the region free of irritants and dust.”

Long-term lash care

After the first 48 hours, there are a few things you can do to keep your lash lift for as long as possible.

The aesthetician should offer thorough instructions for caring for your lash lift in the weeks ahead, but here are a few broad pointers:

  • Waterproof mascara should not be used. Parcells recommends that a small amount of normal mascara is acceptable.
  • Using oils and numerous skin care products around the eye is not advised.
  • Eye masks and eyelash curlers are not recommended.
  • If you frequently rub your eyes, be aware of how often you do so and try to avoid it if at all possible.

Types of lash lift

Lashes can be lifted in a variety of ways. There are several distinct types of treatments accessible. You may anticipate a somewhat different shelf life with each one.

You may observe that your lashes stay luscious for six weeks or more after undergoing a keratin lash lift. After only six weeks, your lashes might return to normal with a length-volume-lift (LVL) treatment.

Yumi or keratin lash lift

A keratin treatment is used in a Yumi lash lift. Keratin is a protein that may be found naturally in hair and nails, giving them strength and suppleness.

“To lift the lash from base to tip, keratin lash lifts require the application of a semi-permanent curling solution,” Parcells explains. “Instead of using a wand, though, a silicone rod covered in keratin is employed to achieve the intended result.

Typically, the process takes about 8 minutes. A serum is then used to set the keratin in place. This might take anywhere from 45 to 60 minutes to complete.

Length-volume-lift (LVL) lash lift

“The length-volume-lift (LVL) curl and volume lashes from the hair follicle root to tip,” says Parcells.

No keratin is used with this type of service. A wand is used to apply a lifting cream, a volume booster, and then a color instead. This treatment generally takes around 45 minutes to complete.

Parcells adds that some customers prefer to have a keratin treatment along with an LVL lash lift. “These procedures might be combined for a natural, wispy lash appearance frequently,” says Parcells.

At-home treatment

At-home kits are available from a few businesses, but most practitioners recommend that you see a beautician.

It may be challenging to work on oneself since your eyes should be closed throughout the treatment to ensure that it is effective. Furthermore, if you leave your treatment on for too long, you risk harming your eyelashes. This is a process best performed by licensed lash technicians.

How to prepare for a lash lift treatment

They are simple and quick procedures, so you won’t need to prepare much. Here are some pro recommendations:

  • Look for a reputable and experienced specialist.
  • Prior to the treatment, do a patch test.
  • On treatment day, don’t apply any cosmetics.
  • Remove contact lenses for comfort prior to the procedure, if you wish.
  • 24 hours before your appointment, avoid curling lashes.
  • Before your visit, avoid waterproof mascara for just 48 hours.

The first step is to locate a reputable and experienced lash lift expert. Look for a salon with a certificate of excellence or excellent ratings on Google or ask friends and family for recommendations.

Here is what to expect during the lash lift procedure

The goal of a lash lift is to make the appearance more appealing and natural. The procedure should be as painless as feasible, with little discomfort.

During the procedure:

  1. The aesthetician will separate your lower lashes from your upper lashes using a special tool.
  2. To produce a lifted, lengthened appearance, they’ll use serum or treatment to paint the lashes upward from the root onto a silicone rod.
  3. They may also add a volumizer and a color to the mix.
  4. The aesthetician will clean and brush your lashes at the end.

Overall, the procedure should take around 45 minutes. All you have to do is close your eyes.

Aftercare on lashes

To make sure your lash lift keeps looking good and lasts, don’t get your lashes wet for at least 24 to 48 hours after the treatment.

After your lash lift, you should also avoid applying too many products to your eyes because this might negate the benefits of the treatment. Serums and conditioners may also be used by an aesthetician before your next lash lift to keep your lashes moisturized and strong.

Lash lift side effects

They are usually a safe procedure, but they should always be done by a professional. If the treatment is left on too long or incorrectly performed, you may end up with one that goes wrong. To put it another way, you might be saddled with uneven and ruffled lashes as a result of this procedure.

After getting a lash lift at a salon, one Reddit user had bent, tangled lashes as a result of the aesthetician applying the solution to the lashes twice in a row, over processing them. After the aesthetician apparently used the incorrect size of rod and left the solution on for too long, a Reddit user named rowdybeanjuice got lashes that were “over curled, going in different directions.”

In conclusion, it is critical to see a professional, experienced aesthetician as the effects of your lash lift will last at least a month.

Frequently asked questions

Want to learn more? Browse the FAQs below.

Is this harmful to your lashes?

Lashes will not be damaged by this type of treatment. Even if you have one that goes slightly wrong, the impact of the treatment is only semi-permanent. The eyelashes on the outer edge of your eyes, which grow continuously, will never fall out or be lost permanently. Every 4 to 6 weeks, they naturally shed and regenerate.

How long does it last?

A lash lift lasts 4 to 6 weeks, depending on the type of  lift you choose and your post-operative care. You may discover that the effects linger for around 6 weeks in some circumstances.

How much does it cost?

This treatment can cost differently in every state and at each type of salon. On average, this type of procedure will set you back between $75 and $200 today.

What is the ideal form of lash lift?

It all comes down to personal preference. You may get a more natural, lifted appearance with a keratin lift, while an LVL lash lift will generally produce a thicker, more dramatic effect.

Takeaway

Lash lifts are a quick and easy method to enhance the length of your lashes. If you’re tired of applying mascara every day, this treatment can save you up to 6 weeks. Make sure to employ a knowledgeable, reputable expert for the operation to avoid any negative effects.

Learn how to do them

If you’d like to learn about how you can become an esthetician and perform lash lifts yourself, check out our website for more details!

Shaving vs Waxing, What’s The Difference?

Shaving can be a hassle for some people, so they might look at other hair removal alternatives, such as waxing. Shaving vs waxing, what’s the difference? Waxing and shaving are two distinct procedures when it comes to removing hair from the body. Wax removes hair from the root via many successive tugs. Shaving is a more minor operation that only removes hair from the skin’s surface and not the root.

Shaving vs waxing, what’s the process like?

Waxing involves applying a hot mixture to the skin and then removing it as soon as possible. Soft wax and hard wax are two different types of wax that can be used for hair removal.

Soft wax, unlike all forms of hair removal, involves the use of wax strips in order to remove hair. Wax is combined with rosin and other substances to create a thick but spreadable texture. The wax is applied first before laying down a strip on top, that is then quickly pulled to remove hair in the same direction that it grows. Hard wax is composed of beeswax, resin, and oils. Hard waxes eliminate hair without the use of strips and become malleable, but stiff, when cooled and can be directly pulled to remove hair.

Shaving, on the other hand, is much more basic in nature and simply requires a razor. Safety razors, straight edges, and electric shavers are the three types of razors. Before the 20th century, straight edge razors resembled an exposed blade, and those seemed to be the most popular.Disposable safety razors resemble those you’d find in the supermarket. Electric shavers are a bit more expensive, but they give a closer shave, and are operated electronically, not manually. To remove hair, all razors use the same technique: They glide along the top of the skin’s surface to essentially “trim” the hair as close to the skin as possible. 

Are there any other differences between shaving vs waxing?

Which areas does it work best for? 

Shaving on a daily basis is typically less difficult, but it depends on personal preference. For the underarms, legs, and bikini region, some people feel that shaving is simpler on a regular basis for maintenance. Some people prefer the long-term benefits of waxing their legs, armpits, and bikini regions. Waxing is more accurate in the delicate skin area of the bikini region, resulting in fewer razor bumps, and is often more gentle on skin and doesn’t have to be repeated as frequently as shaving.

Are there any benefits?

There are a few more perks to consider beyond the aesthetic appeal. But what’s the difference of benefits between shaving vs waxing? 

Waxing also includes the benefit of light exfoliation. Because the substance clings to the top layer of skin, it may pull away dead cells along with the hair and reveal a softer underlying layer. Due to the removal of the hair root from the follicle, hair grows back much slower, maintenance is more infrequent, and when hair does grow back, it is less likely to grow in under the skin and result in ingrown hairs or razor bumps.

Waxing and shaving provide an additional benefit in that they are both able to be done at home, by you. Shaving, rather than waxing, is generally a more readily available and cost-effective way to remove hair at home, and can be done in minutes, while waxing can also be done by a professional waxer and is more time consuming.

Shaving vs waxing: side effects or risks to consider?

There are a few things to bear in mind when it comes to hair removal, no matter what sort of method you use. Shaving vs waxing: which one is better and less of a risk for you?

Waxing has the potential for adverse effects, including:

  • pain
  • redness
  • irritation
  • rash
  • bumps
  • sun sensitivity
  • allergic reaction
  • infection
  • ingrown hairs
  • scarring
  • burns

The risk of adverse effects from waxing depends on your skin’s sensitivity, as well as the person performing the waxing and their level of experience.

Shaving has the following potential disadvantages:

  • itching
  • nicks or cuts
  • razor burn
  • folliculitis
  • ingrown hairs

The side effects of this method are occasionally uncomfortable, but they all have to do with your skin’s sensitivity, the sharpness of the razor, and how moist your skin is.

Is there anyone who shouldn’t do this?  

If you’re taking any of the following medicines, your skin may be more sensitive to waxing:

  • antibiotics
  • hormone replacement therapy
  • hormonal birth control
  • Accutane
  • Retin-A or other retinol-based creams

Shaving may be a good option if you believe that waxing is too harsh for your skin.

How painful is waxing?

This is mostly determined on your pain threshold. Waxing, however, causes more discomfort than shaving since the hair is removed at the root.

How often can you have waxing procedures done?

Waxing requires that hair be between 1/4 and 1/2 inch long. This implies you should generally wax every three to four weeks.

Shaving can be done as often as required, although frequent shaving may cause irritation in sensitive skin.

How much does it cost?

Waxing is more expensive than shaving. Waxing is done by trained professionals to remove the hair from the root, which explains why it lasts longer. A waxing session, on average, costs around $50 to $70. It is dependent on the area you want waxed.

You can expect to pay a lot less for smaller regions, such as your brows or armpits. If you decide to wax on your own, anticipate paying between $20 and $30. Although home waxing may not give the same effects as professional waxing, keep in mind that it will cost you much less money.

Shaving with razors can cost anything from a few dollars for a single-blade disposable razor to $50 for an electric razor. Unlike waxing, though, razors should last considerably longer than one use.

What should you do before your waxing treatment? 

Grow your hair out to at least 1/4 inch before a waxing session to prevent it from being shorter than necessary. If your hair is longer than 1/2 inch, you’ll have to trim it.

The day before, make sure you don’t exfoliate, tan, or dry out your skin with swimming. Avoid drinking coffee or alcohol and applying lotions and creams on the day of the procedure.

Take an over-the-counter pain medication 30 minutes before your appointment to reduce discomfort. Maintain your hair at the length you want it. Soften the skin and hair with a moistened area. Gently exfoliate ahead of time for a smoother, less irritated finish, but be careful not to irritate the skin or remove the hair.

How can you ensure your DIY or appointment goes smoothly?

Waxing and shaving have significantly diverse methods, although the aim is the same: hair removal.

For waxing, here’s what to expect:

  1. First, your specialist will clean the space and apply a pre-wax treatment to prevent any discomfort.
  2. Then, they’ll use a clean application tool — usually a popsicle stick — to apply a thin layer of wax in the same pattern as your hair growth.
  3. They’ll wrap a paper or cloth strip around the wax to break it down. If it’s a hard wax, they’ll take off the hard wax strip instead. Both will be removed in the opposite direction of your hair growth.
  4. The technician will apply a serum or lotion to soothe the region and prevent ingrown hairs after waxing is complete.

For shaving, here’s what to expect:

  1. Exfoliate to remove dead skin cells and greatly reduce the change of razor burn or ingrown hairs.
  2. After you’ve prepped with water and shaving cream, use your razor in a long stroke against the direction of hair growth for a closer shave, and with the direction of hair growth for ingrown-prone skin or sensitive skin. The second method doesn’t remove hair as close to the root, but reduces sensitivities.
  3. Rinse your razor after each time you glide against the skin to remove hair from the shaving surface.
  4. Rinse the head with warm water to remove any remaining foam once all of the hair has been cut. After that, use a rinse of cold water to close up your pores.
  5. Finally, apply a hypoallergenic lotion or cream to your skin.

Shaving vs waxing: what to do after  

You may exfoliate again 24 hours after shaving or waxing. To avoid itching and discomfort, keep the region moisturized.

What can you do to minimize ingrown hairs and other bumps?

Ingrown hairs and moment bumps are possible with both approaches. To minimize, exfoliate ahead of time, and in extreme cases, be cautious and try going with the grain of hair growth, not against. Don’t worry if you get an ingrown hair. It’s a given that it will happen at some point. Picking and prodding at the hair is not a good idea, so apply a soothing oil to help relieve tension.

Which produces more consistent results and how long do they last?

Although the outcomes are comparable, there is one significant distinction: how long they last. Because hair is removed at the root with waxing, it typically lasts around 3 or 4 weeks on average.Shaving causes hair to grow back faster, albeit not as quickly as it did before. Shaving removes only the top layer of hair; therefore, after a few days to a week, most of it has regenerated.

If you’re interested in finding a more permanent solution to laser hair removal, check out Laser Hair Removal 101 for more details.

The bottom line of shaving vs waxing 

There are a variety of ways to remove hair. Waxing and shaving both have advantages and disadvantages, so try them all to see which one works best for your particular hair and skin type.

Ask your waxing technician for a second opinion at your next appointment if you want one. They’ve seen many hair textures and can provide fairly unbiased counsel.

Interested in learning how to give waxing treatments?

Waxing is a required service for every spa, salon, and resort. The more quickly you complete the procedure, the happier your clients will be. NIMA’s Advanced Waxing program focuses on waxing quickly and comfortably. You’ll learn the skills that will allow you to keep a customer happy while finishing a brazilian in less than 15 minutes.

While they practice to hone their waxing skills, students will work with both male and female models. This course includes a waxing kit worth $150 that contains everything you’ll need to start offering treatments. This training is ideal for students who already know the fundamentals of waxing and are legally allowed to perform it in their state.

If you’d like to learn more about this course at NIMA, visit our website for all of the details regarding advanced waxing courses.

How to Become a Professional Makeup Artistry: 6 Career Paths for MUAs

Professional makeup artistry can be a rewarding and fun career path. A makeup artist applies cosmetics to people’s faces to create looks for specific events, fashion runways, special effects, and other situations based on inspiration from beauty trends, client input, and different scenarios.

In this blog, we will discuss the potential career options that are available to those who study professional makeup artistry.

What is a professional makeup artistry?

Makeup artists (MUA) use cosmetic products to enhance a person’s appearance, particularly their face. However, it is possible to become an MUA without attending a makeup school. It may be useful, though you don’t need a professional license to work as a makeup artist in every state.

Makeup artists may work on-call or by appointment, and for possibly lengthy hours, in addition to their normal full-time jobs.

Makeup Artist vs. Similar Roles

A makeup artist is not the same career path as a cosmetologist or an esthetician. A makeup artist is someone who specializes in applying make-up, while cosmetologists focus on the cosmetic health of a person, including hair and skin health, and estheticians assist with full-body medical skincare by offering facials, full-body treatments, massages, and more.

6 Professional Paths for Makeup Artists

Depending on their particular interests, professional makeup artists may pursue many professional paths. The following are some career options for professional makeup artistry:

  1. Fashion makeup: Makeup artists who work for designers on fashion shows and photoshoots are examples of professional makeup artists. Their looks differ depending on the designer, but most are bold, creative, expressive, and don’t adhere to typical societal beauty standards.
  2.  Bridal makeup: This position is concerned with creating a look that complements the wedding’s concept and the bride’s desires. Makeup artists generally meet with the bride before the wedding to establish a style and do touch ups throughout the day.
  3. Beauty brand makeup: This part of makeup artistry works with cosmetic industry professionals and businesses to promote items in stores and photoshoots.
  4. Cinematic makeup: Given the rapid development of film and television equipment, this makeup look will require a smoother finish in the future, but it is dependent on the narrative, director, and genre of the project. These artists spend a lot of time on set. Makeup specialists use special effects makeup to create other-worldly prosthetics for actors in movie makeup, or everyday looks that fit the scenes the actor is portraying.
  5. Theatrical makeup: These makeup artists create looks that can withstand heat and perspiration by utilizing bright lights on active performers for hours. The exaggerated style makes it easy to see by the entire audience.
  6. Face and body paint: Using airbrushes, these artists create distinctive and magical looks for customers. Their work may be seen on the big screen, in a theater setting, or at specific events.

The 4 Simple Steps to Become a Makeup Artist

In order to pursue a successful makeup artist career, you’ll need: passion and ambition, as well as a few pointers along the road toward their goal profession:

  1. Hone your craft: Start simple. Explore all of the internet has to offer, and look for your local drugstore cosmetics counter or beauty supply store for basic tools. As your skill with cosmetics improves, add higher-quality tools to your makeup kit at a professional makeup boutique. Students will also learn the fundamentals of cosmetic artistry during a makeup education course.
  2. Get real-world experience: Look for work at a local beauty shop or theater, where a budding makeup artist can practice more exaggerated styles and learn how lighting affects the final appearance, if you’re not ready to go to beauty school or another training program. This is when you should put together your cosmetics kit in order to be ready for any event.
  3. Professional training: Cosmetology programs give makeup artists hands-on training and the opportunity to network with other makeup artists. To sell your particular skills as a specialist, you’ll need to construct a portfolio. While film, television, and fashion don’t usually need you to be a certified makeup artist, there are certain instances when it is required. Health consciousness, safety, and cleanliness between clients are always required when working with multiple people and one set of tools.
  4. Get your license: Working as a makeup artist is regulated differently in each state. Some states demand certification, while others need a cosmetology license obtained through professional education at a cosmetology school. In many places, neither is necessary. If you work in a salon, you may need a cosmetologist or esthetician’s license.

Are you interested in starting professional makeup artistry classes?

Makeup artists are in demand in every sector. Every industry requires a skilled cosmetic artist, from fashion to horror to weddings to Pop Art, from Comicon to politicians. You can pursue a wide range of careers, and the possibilities are exciting. The best MUA instructors in the business are taught by NIMA. You will walk away with more knowledge, understanding, and inspiration than you ever imagined. In this class, you’ll get the finest kit in the business.

Each item has been hand-selected by your instructor with a focus on quality and versatility. Your kit will allow you to create a full range of looks, from natural to mega-glam, and everything in between. This course is open to anyone and is advanced enough for those interested in becoming a makeup artist.

However, this course is highly entertaining and a fantastic investment for anybody who just enjoys beauty and wants to learn more about the makeup industry. By the time you get your certification, you’ll have already started assembling your portfolio with photographs from each makeup look you’ve completed.

If you want to learn beyond professional makeup artistry, learn how to find an esthetic school that offers more classes.

7 Things To Do After Your Microblading Training

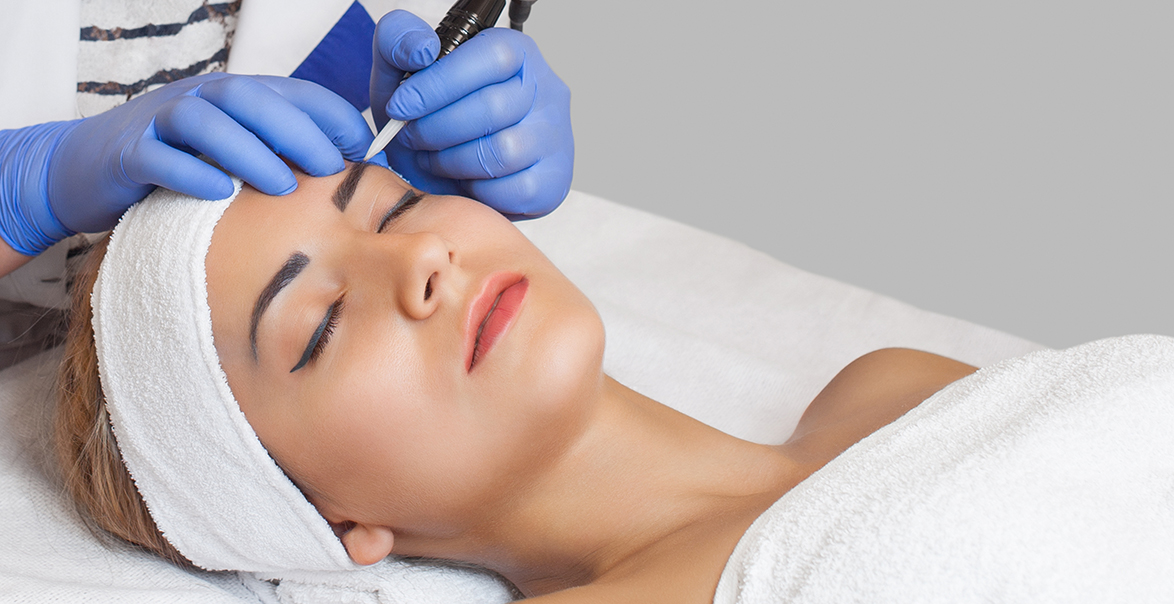
Are you currently in a microblading training course or have you recently finished a microblading certification course? Congratulations! You’re about to start a wonderful profession, but before you go on a blading binge, there are a few things you should know to get off on the right foot.

These suggestions may appear to be simple, but when done with consistency, they will have a significant impact on your life in the many years ahead in your career.

The equation: artistry first, business is second

You must bear in mind that your company is built on the backs of its customers. As a result, if you can’t make someone appear and feel attractive, you have no business. The first component of the equation is to ensure that you are exceptionally skilled in your methods. If your work isn’t polished enough, no one will want to use your services. This is why the microblading training you receive is so essential.

Let’s break it down.  

Mastering Techniques 

In this Microbladers interview with owner and master artist, Danielle Greisen, she discusses how mastering the trade takes time. Mistakes are unavoidable, and more than that, they’re an important part of the learning process. Prepare to make errors when you master your microblading training skills. When you don’t get it right the first few times, don’t be discouraged.

It will, however, be very beneficial if you can collaborate with someone who can assist you in these early phases of your profession. Is your trainer available during your first session? Is there someone available to answer your questions while you work on your first client? Choose someone who will be patient with you while you are learning, but also someone who can help you trust yourself that you’ll be able to complete the task on your own in the future. It’s also not a good idea to be too reliant on others. Pay attention to what other students have to say about their experiences. But where can you go for such help? The solution — apply for a microblading apprenticeship.

It’s not enough to have classroom training; you may have heard of companies that claim you can start taking clients in a few days. An artist who immediately starts working after formal training is far more likely to produce poor outcomes than one who has practiced for at least six months. This is the ideal length of an apprenticeship program, so make sure to check these details before you enroll.

Apprentices that start taking clients at the beginning of their program do exceptional work in some instances. This allows you to begin taking more customers, while being an apprentice and still getting the support and assistance you may need while you get started, depending on your speed and how quickly you get comfortable with your tools.

Starting Your Business After Microblading Training 

If you took the time to master your talents, the business side of things will most likely take care of itself. However, you must also get assistance from your training center in order to succeed. When an apprenticeship program gives marketing and business support to its students, it is a good indicator that it is designed to enable you to succeed.  

There isn’t a better way to increase your clients, master marketing yourself as an artist, and thrive in the microblading industry than with our unique course content. This post goes through all of these topics in detail.

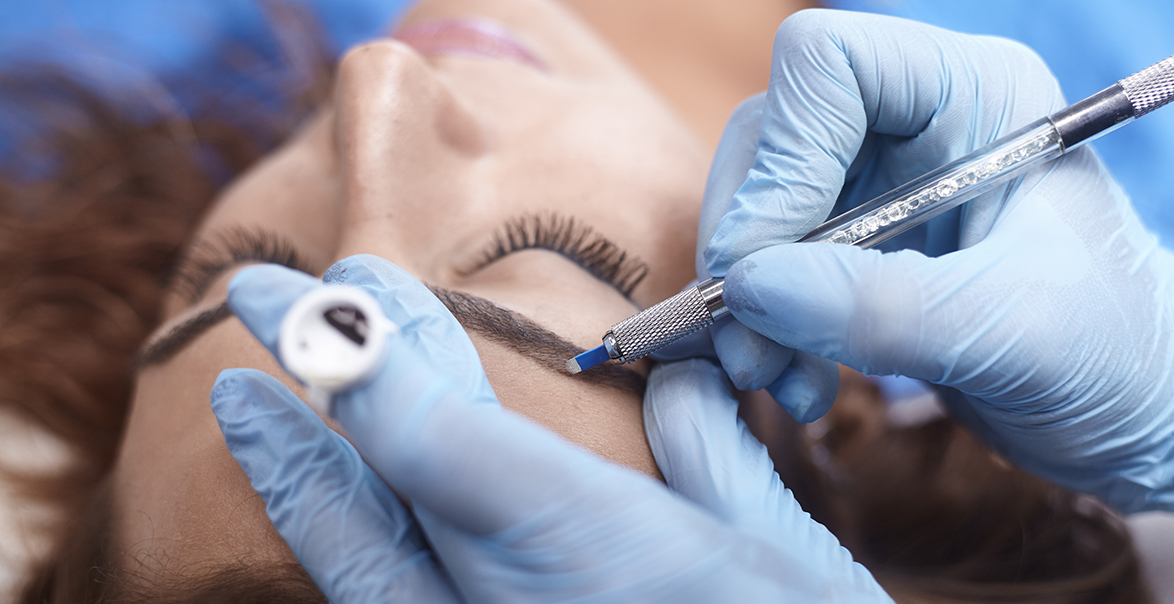
The artist’s tools: making your magic come to life

So, we’ve discussed you and your talents. But you don’t work with only your hands. Microblading tools are used to help you get the finest outcomes. In art, it is sometimes argued that the tools are less significant than how they are employed. That’s true in some situations, but microblading is performed on individuals’ skin. It is vital to remember that this isn’t a canvas onto which you can simply toss anything. It’s similar to a tattoo, and if the job isn’t excellent, you can’t just throw it out.

Microblading, as you’ve been taught in training, is a type of semi-permanent makeup. Any error committed on a customer’s skin may linger for years. PMU correction is an option, but it’s typically best to avoid doing work that doesn’t need one in the first place.

The pre and post care products you use will have an impact on your client’s skin, which will influence the quality of your job.

Here are some of the most crucial things to consider: 

Pigment

When it comes to applying eyebrow color, using well-known pigment lines will guarantee that you get the color and shade you want for your customers’ brows. During training, you’ve recognized that pigment appears distinct after it has been newly applied rather than when the brows have healed. When a pigment is extremely inexpensive, some may not have the same anticipated outcomes.

Which pigment lines do your trainer and training establishment use? How about the industry experts? The quality of the product will also have an impact on their work. It doesn’t hurt to check the clients before and after photos on social media or websites. Keep updated because there are always new products that will be more superior than older ones. 

PMU machines

Permanent makeup machines come in a variety of price ranges and provide varying levels of control. Some are suited for novices while others are intended for more experienced artists. If you’re feeling more comfortable with your tools and ready to experiment, you’ll need machines that can handle a wider range of applications.

Disposables

Here at NIMA, we strictly adhere to the practice of utilizing disposable needles for each customer. Gloves, masks, bed coverings, and other similar items are all handled in the same way. Because PMU artists are considered high-risk to communicable illnesses by the State of Nevada, you must acquire a Bloodborne Pathogens Certificate. Avoid reusing needles and learn how and where to dispose of biohazard materials.

Learning about blades at microblading training

Your microblading pen’s blades have two functions. One is to make tiny incisions in the skin, and the other is to put the color in at the same time. Find out as much as you can about the different needle points and sizes since they influence the width of hair strokes produced. 

Sharpening your eyes

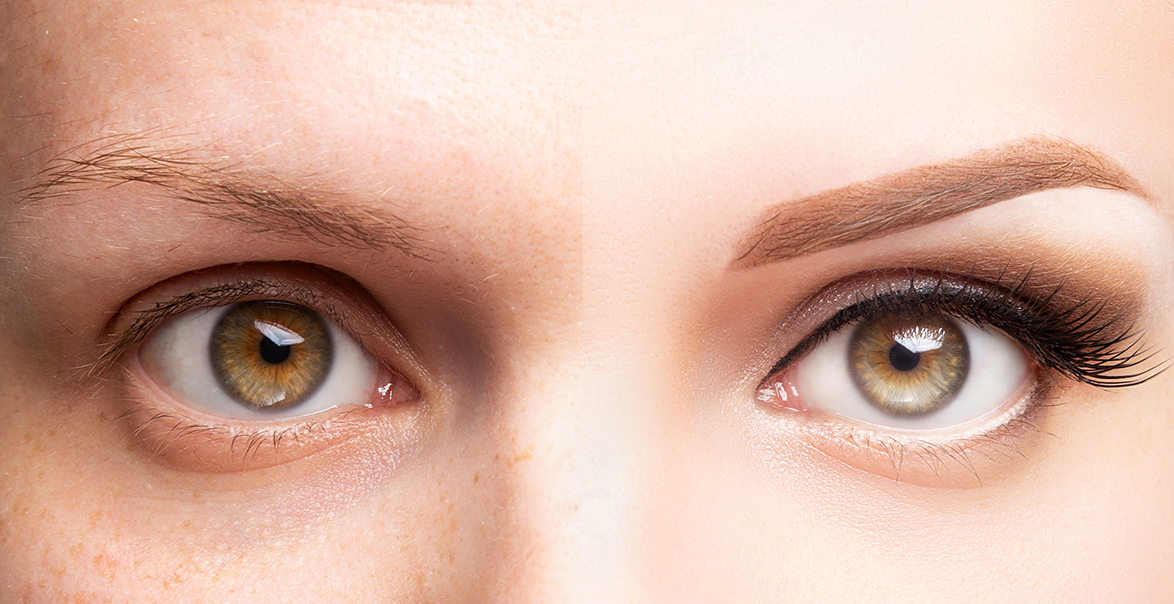
Microblading is a type of semi-permanent tattooing that is usually completed in one session. The appeal of microblading lies in the fact that you can see and measure your progress. You will be able to see how much you’ve improved as you work on more clients after taking photographs.

Document your progress from beginning to end, including photos of each application and the final healed results. You’ll have a keen eye for detecting whether you or other artists have done excellent work over time, as well as ideas on how to improve it.

But, as with any form of art, you should not expect everyone to appreciate it. However, your eyes are not the only ones that should evaluate your work. Request professional feedback from experts and be receptive to their advice. These skilled artists have seen and treated hundreds of brows before. You can learn a lot from them and they’ll be able to assist you in developing your abilities.

Growing with the industry, microblading is an ever expanding career

The popularity of microblading has opened up more job prospects for artists than any other beauty specialty. Do not remain in one place for too long. Take advantage of the industry’s growth or risk being left behind. Sure, doing just one or two treatments might be lucrative, but if you don’t venture outside of your comfort zone, your career may plateau or even decline. This implies that new ideas are springing up all the time. Micro shading is having a moment, and Nano Strokes are just one of many techniques that have been used to add micro textures.

After practicing microblading for some time, Danielle Greisen, our master instructor at MicroBladers, advises artists to take more advanced classes. One of the most basic examples of an advanced course is micro shading. This course teaches you how to master both manual and automated techniques. You’ll also learn how to do combination brows and other things as you advance.

Advanced skills will help you grow your professional network and diversify your client base. What if a client isn’t a good candidate for micro blading? What if they want brows that are more aggressively defined? Will you be unable to take their business and send them to someone who knows better how to do microblading the way they want, because you don’t understand it? Be aware of your skill set, and constantly look to improve and be the artist your clients, and company, can rely on. Because if your clients know you can handle everything, if you can do numerous approaches, you’ll receive more referrals.

Practicing sub-skills after microblading training 

There is a difference between putting countless hours towards practicing your general skills, and deliberate practice, honed in on a specific technique.  

According to the experts, it takes 10,000 hours to master a talent. Yes, practice as much as you can, but what matters more is honing particular talents.

There are many sub-skills to master in any skill. Microblading isn’t simply a procedure; it’s also a language, with its own set of rules and guidelines. You must learn color theory, hair strokes, pressure, control, and other things in order to microblade effectively. These sub skills are what make up a specialized skill. Set aside time to practice each of them as often as possible. More importantly, continue practicing them even after you believe you’ve perfected your technique. It’s possible that your skills will deteriorate, like muscles, if they are not exercised regularly. Artists who are successful always hone their craft. They never stop learning.  

Committing to the routine after microblading training 

What does this signify? There are always portions of any job that are tedious. One of the regular jobs for microblading professionals is to maintain a tidy studio. It’s also essential to keep your workstation clean. Whatever you do, make sure you do it on a regular basis.

Even a single oversight may result in significant damage, no matter how small. A creative who is really enthusiastic and dedicated to their work is also committed to the basic and often monotonous activities. Washing your workstation after a treatment, wearing scrubs and gloves, and so on are all little things, but they reveal a great deal about your skill and suitability to this career. 

When communicating with your clients during their consultation, be thorough. You’ll have to repeat the same information over and over again. It might get tedious, and you may be tempted to overlook important information. Don’t do it. It is part of your job, and is crucial to your clients’ confidence in your work.

Integrity is the lifeline of any business

Finally, as you advance, you will notice that more individuals have faith in you. It’s easy to get caught up in your early success and forget why others trusted you in the first place. When you’ve got a lot of clients, it’s tempting to believe your company policies no longer need to be followed, or safety guidelines can be streamlined and corners can be cut.

They may start using lower-quality goods and equipment in order to be “more efficient” and faster, despite regulations in place. Though it may seem less important than fast results and more business, this can result in a loss of clientele for you or your company.

We provide artists at NIMA with the tools and mentorship they need to flourish as microblading experts in all areas of their business, so we welcome any questions you may have about our training programs. We encourage you to enroll in one of the best apprenticeship programs available. Start learning right away or get more information by contacting us now.

If you want to learn more about how to find an aesthetic school, read our blog for more details.

What You Can Learn At Esthetician Schools

If you’re into skin care, you may have a multi-step daily skin care regimen or be scouring beauty YouTubers’ channels for advice and suggestions, and you’ll always have skin care recommendations for your friends dealing with dryness or pimples. If you enjoy the science behind skin and have a desire to help people, consider becoming a skin therapist or esthetician. But what are estheticians?  You might be wondering, are there esthetician schools? 

Estheticians are people that specialize in enhancing the skin. Estheticians provide cosmetic skin care services, such as facial treatments and more advanced exfoliation therapies, laser hair removal, nail treatment, waxing, eyelash and eyebrow work, and makeup application during their job. Estheticians help with waxing, laser hair removal, massage and other treatments. They may work in salons, day spas, skin spas, medical spas, dermatologist offices, or medical practices.

All of this may sound sensible with your objectives in mind, but you might have a few concerns: How do I go about becoming an esthetician? What is the process of becoming an esthetician, and how long does it take? What do esthetician schools entail, and what do you learn in one?

To respond to the first set of questions, the timetable for becoming an esthetician varies by location, depending on licensing and certification standards as well as the duration of your esthetics education. Esthetician schools generally last between a few weeks and two years, depending on the program. For some courses, such as a two-year associate’s degree in esthetics, you may anticipate to spend up to two years in school.

What Does Esthetician School Consist Of?

To address the second aspect of what you’ll learn in esthetician school, we’ve put up a short sample course list to help you visualize what esthetician school is like and what it entails in terms of study.

Note: At any college or institute, our training curriculum is updated on a regular basis, so the esthetician class names and descriptions you see may vary after you’ve signed up for and taken the course. You may also ask us for more information about what your specific program will entail when you request further information throughout the application process.

Esthetician School: A Quick Course Guide In addition to theoretical and practical applications of esthetics, your program should provide training in both. The coursework may cover dermatology, physiology and histology of the skin, product chemistry and components, and salon safety and cleanliness. The practical side of the program focuses on developing hands-on skills that will help you flourish as an esthetician. Waxing instructions are among the many training topics available. Depilatory waxing procedures, mask therapy, make-up application, and more are just a few examples of lesson plans.

Below are some classes you might take at esthetician schools:

Aging and Advanced Body Techniques: This section discusses the development and management of aging theories, as well as bodily processes such as wraps, scrubs, body masks, and sunless tanning.

Anatomy and Physiology: Students study the physiology and histology of skin cells and tissues in this lesson to better comprehend how skin works.

Business: Business courses cover resume writing, interview skills, job hunting, and business/professional growth to prepare youngsters for a career in esthetics.

Color Theory and Makeup: In this course, students learn the major concepts of color and how to apply makeup. Students learn how to use makeup for a variety of purposes, including daily makeup, formal make-up application, and corrective make-up.

Cosmetic Chemistry: This covers the fundamental principles of chemistry and biochemistry, as well as the physical and chemical characteristics of items (including frequent components in skin care formulations that might aggravate sensitive skin and allergies), pH, and how all of these things impact upon skin care products and therapies.

Dermatology: Dermatology courses educate students to diagnose skin diseases and flaws, understand the contraindications to therapy, and know when to send a client to a dermatologist.

Electricity: This section covers the basics of electricity, including safety concerns, as well as equipment used in the esthetics business.

Masks: Students learn about masks (including natural-ingredient mixing masks), application methods, and mask contraindications.

Massage Techniques: This course covers basic massage strokes, as well as the advantages and contraindications of facial massage, body mechanics, reflexology, and lymphatic drainage.

Medical Esthetics: Estheticians can explain to those interested in working in a medical office or medspa about the scope of a physician’s practice and the many pre-operative and post-operative treatments that they may perform.

Methods of Hair Removal: This portion of the protocol addresses client preparation, proper waxing techniques, and waxing precautions, as well as gender-specific considerations. Sanitation, safety, and first aid for emergency situations are also addressed.

Sanitation — Bacteriology and Infection Control: This section discusses the levels of decontamination, including sanitation, disinfection, and sterilization, as well as how to sanitize a variety of equipment and surfaces in the treatment room.

Skin Analysis: It also helps students figure out what type of skin they have and the reasons for any problems.

Skin Clinic: Students in this program acquire practical experience by utilizing the skills and expertise they’ve learnt in class on people from the general public.

Want to Know More About What It’s Like? 

Become a licensed aesthetician with NIMA Institute, an esthetician school! We offer multiple programs to earn your licensure with us including Nevada 900 Hour Aesthetics, Utah 1200 Hour Master Aesthetics, Utah 750 Hour Master Aesthetics, and Online options. Our full curriculum will prepare you for your career in this industry.

Already a licensed aesthetician? Advance your career with our certification courses. Build up your resume with everything from Advanced Peels to Vampire Facials. There are so many opportunities in the aesthetics industry, let NIMA Institute show you the way.

To learn more about how to find an esthetician school, contact us or check out our blog!

What to Expect From Taking Microblading Classes?

The eyebrows are an indication of your emotions. The eyebrows are a significant facial feature that many women wish to draw thicker and more distinct lines in order to make them well-formed and nicely designed. Microblading is a new and longer-lasting technique of sculpting and customizing the brows that has recently been developed thanks to the newest technology in permanent make-up. Not all people can do microblading since it necessitates the use of specialized instruments to put the pigments in the skin layer. As a result, in order for this procedure to be done safely, someone must go through a microblading classes.

Before you choose to enroll in microblading lessons, consider what you’ll do after you’ve earned your certificate.

Learning about eyebrow issues at microblading classes

There are individuals with brows that have been excessively tweezed or can also be under-tweezed. When it comes to brows, they need a microblading artist to address these concerns. Injury and some medical conditions can also cause problems in the brows; while others require microblading treatments as their brows age. These circumstances might result in patchy, uneven brow growth that is not attractive. They have an impact on one’s appearance and self-esteem.

Make-up pencils have been used for brow makeovers since they are designed to be worn only for a day or two. This may consume an excessive amount of time if someone is always on the go. Microblading is the finest choice when it comes to shaping your brows. If you are good at it, you may offer the service to them. Many people will accept your microblading services as long as you can meet their specific demands with your shaping skill.

Make people feel more confident

Many individuals want microblading treatments to make them feel better about themselves and look good. Many people desire brows that are well-shaped and attractive. They’ll look better with their naturally shaped brows. However, only the most experienced microblading artist will be able to accomplish this. As a result, the finest choice is for you to get trained in microblading.

Understanding the Microblading Process

The procedure of putting semi-permanent pigment in the brows is known as microblading. The brows are tattooed with a microblading tool, which creates lines of color in the brow that resemble natural hair. If the brows are already hairy, this method has no effect. The colored pigment is inserted into the dermis so that pigments will not fade as easily.

As a microblading artist, you create the color using the client’s skin tone and facial structure as inspiration. The design is drawn with the pencil and then a cream is applied to the brows to numb them. Now is when you do microblading utilizing a microblade tool, which is when tiny blades are used to create small cuts in skin.

The Microblading Classes

If you’ve decided to become a microblading artist and serve your community’s customers, the first step is to enroll in a microblading training program. During the training, you’ll get a lot of information about microblading and microblading procedures.

Microblading Techniques

Microblading has a wide range of microblading techniques that you can master. The hair on your face are patterned, resulting to naturally appearing strokes, in several ways. Before you apply strokes, however, you must first assess the client’s requirements and evaluate important elements in order to decide the appropriate technique to use and whether or not the client can have microblading.

Before you get microblading, you should think about your skin tone and facial structure. There are several aftercare measures that every microblading artist should be aware of. During training, you will learn all of them.

Color Theory

You’ll learn how to match the color of the pigment to your skin tone in this lesson about color theory. During the microblading training, you will be working on live models so that you may see how these pigments you put on skin would improve or degrade a person’s face with that specific skin tone and facial form.

Safety in Microblading

You will need to be particularly cautious when microblading since you will be using microblading instruments that go deep into the layers of the skin. You’ll discover how to maintain the equipment sterile and clean. You’ll learn about problems and issues with microblading during your microblading training, such as medical issues that might prevent you from obtaining microblading treatments.

Microblading Kit

The microblading curriculum will also include a microblading kit that you may utilize to get your career or company started. You may inquire about the microblading tools that are supplied as part of the course and those that you can use for practice or for your clients after the training.

Microblading Business

During training, having a clear vision of the end product is essential. You want to be a microblading artist, so you will be interacting with individuals. It’s difficult to get the word out about your business when you’re just getting started. The microblading training will also teach you how to establish a company in a timely manner, such as selecting the proper location and other business activities.

Questions to Ask about the Microblading Training School

Here is a list of questions to ask in order to locate the best training facility:

  • Is the training staff licensed and certified?
  • How long have the microblading artists been practicing?
  • The individuals they served for microblading services.
  • What is the total cost?
  • What are the benefits of this course?
  • Is the microblading training a good source for new methods?
  • Is there any type of follow-up or aftercare that the course will provide?

Microblading Classes at NIMA

NIMA has partnered with Couture Brows, which is a group of industry-leading specialists that provide an unrivaled learning experience in our microblading classes. You’ll study the most cutting-edge methods, as world-class microblading instructors. We will teach you how to produce delicate, feathery, and realistic hair strokes that resemble real brows. The handbook also teaches you how to create the ideal brow for each face shape and eye type.

Microblading is a new fashion in brow decorating that has created a lot of money for creative experts. This training is suited for those licenses that are authorized in their state to provide these services. Common licenses include non-licensed individuals, ME, RN, PA, APRN, MD, DO. NIMA recommends that you check with your state to determine the licenses necessary within your area of practice. This program meets all requirements for the NV “Body Art Card” certification.

What you will learn:

  • Workspace preparation
  • Client preparation
  • Drawing the brow
  • Applying pigment
  • Airbrush blending, stroke, shading, & ombré techniques
  • Students perform 3 model applications
  • Microblading & Soft Tap methods
  • Combo procedures

For more information about the microblading courses at NIMA, click here to see how you could advance your career. If you’d like to learn more about services NIMA offers, such as laser hair removal, read our laser hair removal blog to find out more.